I finally finished my basement!
You're probably thinking: "Wait, wasn't it already finished?" You may remember
this post from 2009, and figured I must have been done long ago, but didn't post about it. Well, you're wrong. I took my sweet time and finally finished it, 2 1/2 years later. The actual finish date was in March, but of course it took me forever to post about it. Blogger's dashboard is much better now at uploading pics, I am happy to say, so there's probably way more pics here than anybody would ever want to look at.
Timeline:
August 2009: Started framing while Mel was at Girl's camp
September 2009: Finished framing, started electric
October 2009: Finished electric, did insulation in 1 day, and started drywall
December 2009: Finished drywall, started mudding/sanding
January 2010: Stopped mudding/sanding, realizing I wanted to drywall the ceiling instead of doing a drop ceiling
Feb/March 2010: Rains/floods came, 4 inches of water in the basement
April 2010: Ripped out bottom 4 inches of drywall/insulation. Dried wood to prevent mold
January 2011: Got inspected, called out an electrician to redo a few things. Passed rough inspections
Feb 2011: Redid a few soffits, and built a couple new ones
March 2011: Drywalled the ceiling/soffits. Asked YM in my ward if he wanted to do the mudding/sanding for 500 bucks
April 2011: YM in ward gave up. I gave him 80 bucks for his troubles.
May 2011: Hired plasterers to plaster all walls instead of mudding/sanding
June 2011: Painted the basement walls with prime and the base coat of yellow
December/January 2012: Did the stair railing and stringer, put in the baseboard trim, redid the doors
February/March 2012: Finishing touches, like filling the seams/cracks/holes, trim around the doors/windows, touch up painting (blue soffits, for example). Had carpet installed.
You'll notice 2 large breaks, between April 2010 and January 2011, and June to December 2011. That's when I got sick of working down there, also the summer/fall lawn maintenance is pretty time-consuming.
The overall cost was around 7300. This is how I estimate it:
Tools: 1000
Materials (wood, drywall, insulation, doors, wire, stair stuff, paint, nails): 3000
Plasterers: 1200
Electrician: 400
Permits: 200
Carpet: 1500
I have no idea how many man-hours were put in, but it was probably significant. My favorite part was the wiring, framing, and the stair work, in that order. Drywall wasn't terrible, but got old after a while. Mudding and sanding was pure death. Painting was not exactly fun, but not bad. The trim work was kind of fun, but frustrating too.
I ended up doing a decent amount of rework, with the water damage, soffits, and doors not installed very well the first time around. The advantage of doing it yourself is that you can take the time to do it right. The disadvantage is that it takes forever. Overall, I'm glad I did it myself, as I got to learn a lot, and I enjoyed most of it. If I ever do another project of this scope again, I will do the framing/electric/insulation myself, then contract out the drywall and plaster, and then do the finish work.
My most valuable tools were my squares and levels, and my "Employees of the Month" (you'll see in pictures below). I wished I would've spent good money on a 3-foot level, but I didn't. Also very valuable were the miter saw, drill, utility knife, sanding sponges, large putty knife, and chisel (surprisingly). My favorite tools were the nailguns, but I didn't use them that often, and were the most costly.
The dimensions of the large room are 23x13. The hallway is about 12 feet long. The main purpose of the room will be a toy room for Hendrik and future siblings. I call it "Hendrik-land" for now.
Here are the before/during/after pics:
 |
| When we first moved in - Aug 2008 |
 |
| Adding the vapor barrier and the footer beams - Aug 2009 |
 |
| Midway through framing - Sept 2009 |
 |
| Building the corner soffit - super boxy |
 |
| After insulation - Oct 2009 |
 |
| Midway thru drywall (you can see that I put drywall right over the door on the right side) - Nov 2009 |
 |
| Done with drywall - Dec 2009. Note the big boxy green soffit in the corner-more on this later |
 |
| Flood of March 2010 |
 |
| Post flood, April 2010. I ripped out the bottom 4 inches of the wall and insulation, letting it dry out and breathe. I didn't work on the basement for a solid year after this. |
 |
| Finished product, April 2012. As you see here, there was a large jump from drywall to finished product, skipping over the mud/plaster, trim, painting, and carpet steps. You'll see this on all sections of the basement, as I generally forgot to take pictures after the flood, which sucked a lot of life out of me |
 |
| Same wall, different angle. You can see that I redid the soffit on the right side, which used to be a big box, instead I angled it and that made it much, much better looking |
 |
| Looking SE, this next series of pictures will show the wall that came up where that red pole is |
 |
| You can see the stairs in the background here |
 |
| Midway through framing. Where the couch is, I was originally going to put a bathroom there, but scratched that for now. It's possible in the distant future, depending on how long we're here. |
 |
| This is a different angle, but this is the south wall and the exterior door, on the west wall. |
 |
| Drywall, note again the door for the bathroom being drywalled over. The hallway door is more evident now |
 |
| The soffit in the left corner ended up being redone to cover more of the pipe, when I decided to go to a drywall ceiling instead of a dropdown |
 |
| I just painted the pipe and left it exposed. You can also see the area underneath the stairs was left open |
 |
| Deciding not to have the dropdown ceiling meant more soffits to cover the various pipes and junk. We decided to embrace the soffits by painting them blue and adding color to the room. Note the exterior door doesn't go to the floor, so the baseboard trim goes right under it. |
 |
| This next section will be the area underneath the stairs, where the yellow insulation is here |
 |
| As Hendrik would say..."Big mess!" |
 |
| Framed the bottom of the stairs by nailing a 2x8 down the stairs, attached to the 2x4s going across... |
 |
| ...then just slapped a drywall panel straight on |
 |
| The angles were tough, but it worked out |
 |
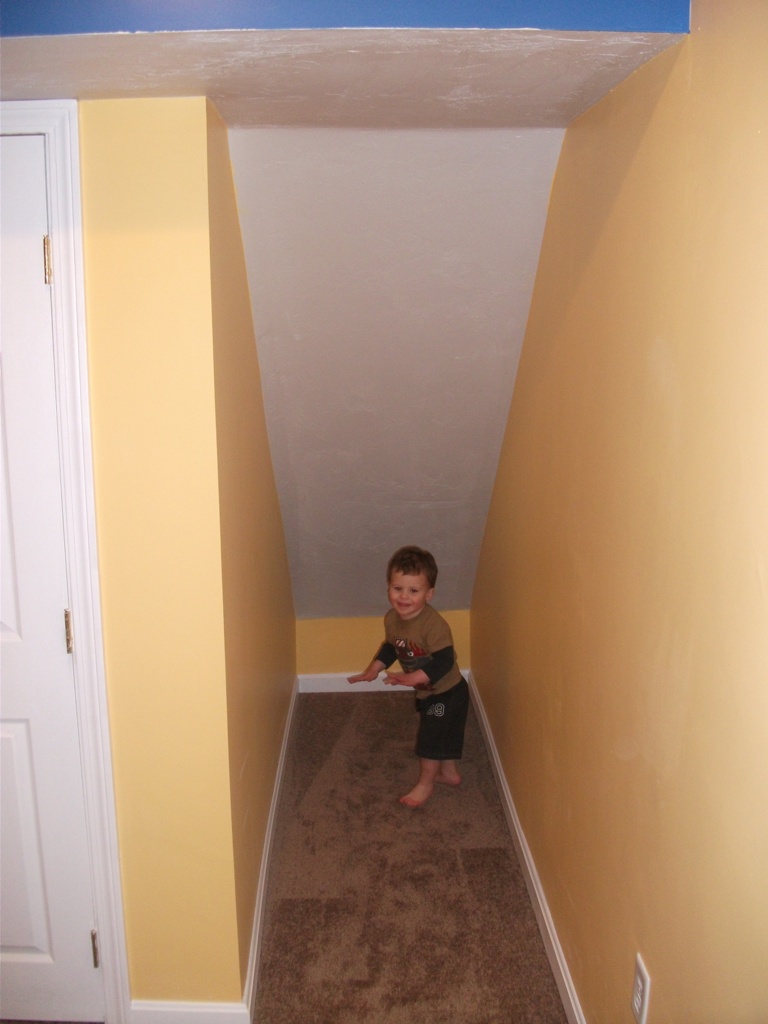
| Hendrik loves this little area because he can touch the ceiling. That back side is only like 20 inches tall, so doing detail work down there was a huge pain |
 |
| With the soffit above |
 |
| Now we look at the hallway, looking east |
 |
| After framing, you can see the hallway door to the right, the bathroom door to the left |
 |
| After insulation |
 |
| Drywall |
 |
| After drywall |
 |
| And...the flood ruined everything |
 |
| So I cut out the bottom 4 inches |
 |
| Finished product |
 |
| Now, the hallway looking west, from the bottom of the stairs. It's going to go between the beams to the left and the red post |
 |
| Framed it up! |
 |
| The specks in the pic were from all of the drywall dust |
 |
| And the finished product |
 |
| The stairwell - Taken before we moved in |
 |
| You can see the large pipes here that I had to go around, which made for some very tricky angles |
 |
| Right before I took out the wall |
 |
| I decided to take out the stairway wall to open it up a little |
 |
| You can see here the large pipe that I framed around |
 |
| Insulation was a pain here, since I didn't do the framing on the 16" standard, instead on each stair |
 |
| Our lovely stair model Melanie is showing off the 2010 model staircase |
 |
| Looking down |
 |
| Here's what all the angles ended up looking like. Mudding this was a huge pain |
 |
| Overall, it looked pretty good I think! |
 |
| Probably the #1 hardest thing to do was to get the angle right of the rail going into the newell at the ceiling there. Took forever |
 |
| I'm most proud of the stairs, even though I probably put the ballisters too close together... |
 |
| ...as you can see here. The angle of this pic makes it look like they are uneven and crooked, but get your levels and rulers out and you'll see they are evenly spaced and straight as the day is long |
Miscellaneous pictures that nobody but me are probably interested in....
 |
| This is to document the mess |
 |
| Serious, a ton of crap just piles up over time |
 |
| Before we moved in |
 |
| Framing the laundry room |
 |
| The laundry room section of the flood |
 |
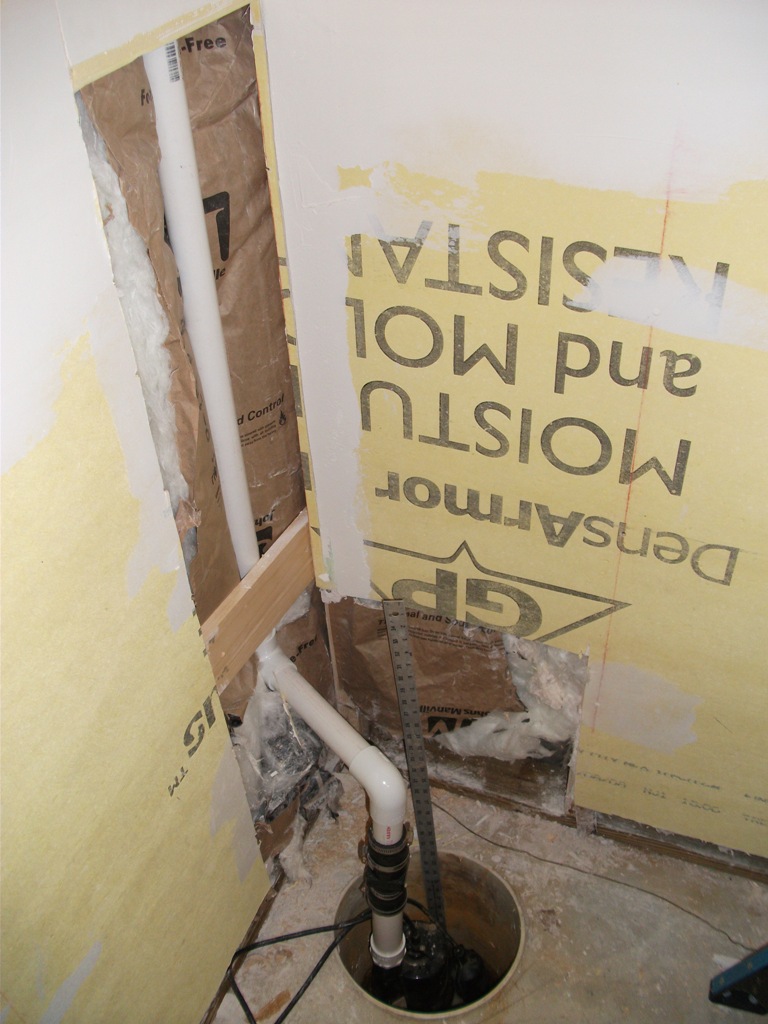
| After I fixed the drywell, I installed the sump pump and had the pipe going into the wall and up to the outside. I bought a cabinet to sit over this |
 |
| The drywall wasn't working because there was no way for the water to seep in...so all I did was punch a hole in the bottom and water came gushing in |
 |
| Going outside |
 |
| The soffit at the end of the hallway |
 |
| Some wiring...this is for the baseboard heaters |
 |
| One of the outlets |
 |
| Wiring one of the lights, which we replaced with the recessed lighting eventually |
 |
| Running wire through the beams, also my trusty miter saw |
 |
| And all the wires go back into the happy nest |
 |
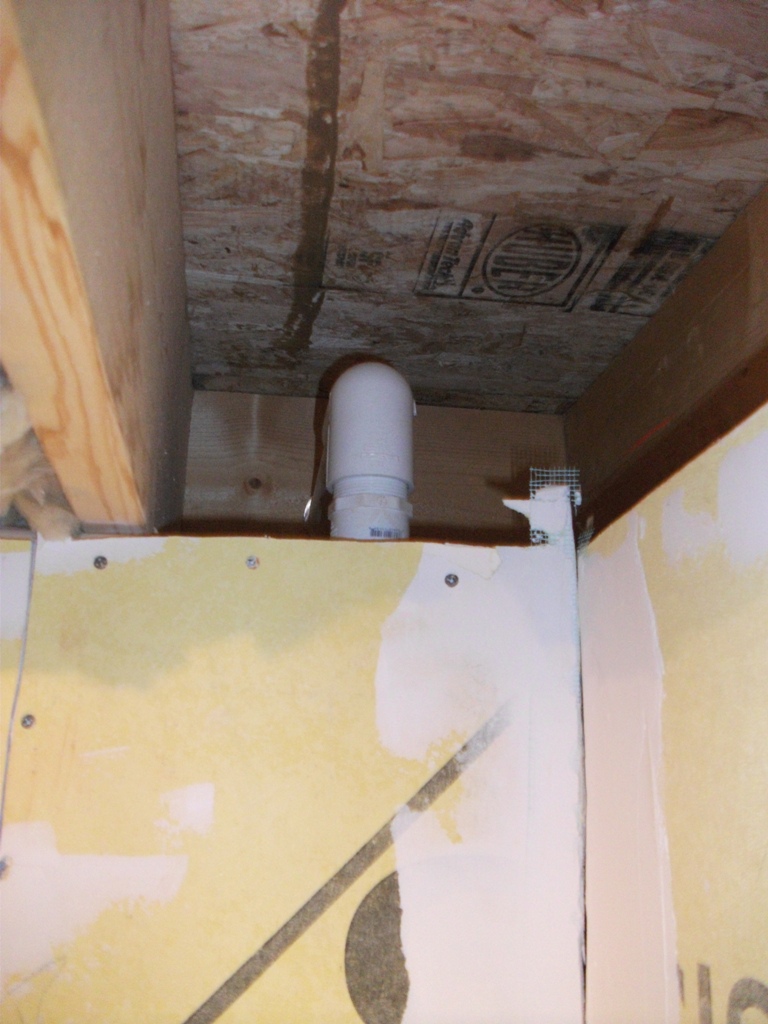
| The ceiling at the bottom of the stairs |
 |
| This picture shows two of my favorite tools..."The Employees of the Month", which essentially hold up wood and drywall for you so you can have your hands free. They are named thusly because they replace a slacker without a high school diploma, and they do a better job |
 |
| That couch was given to us by our neighbors. I thought it was a great couch and was going to keep it down there until I realized how badly it reeked of dog |
 |
| Have fun in your new room, Hench! I named the basement "Hendrik-land" although he won't go down there on his own yet. Here's hoping. |